| FAQ | iOS | Mac |
The Basics
EditingImporting and Downloading dataTroubleshooting |
SitesSelecting Sites from the Sidebar lets you view and manage the sites you've dived at, or want to!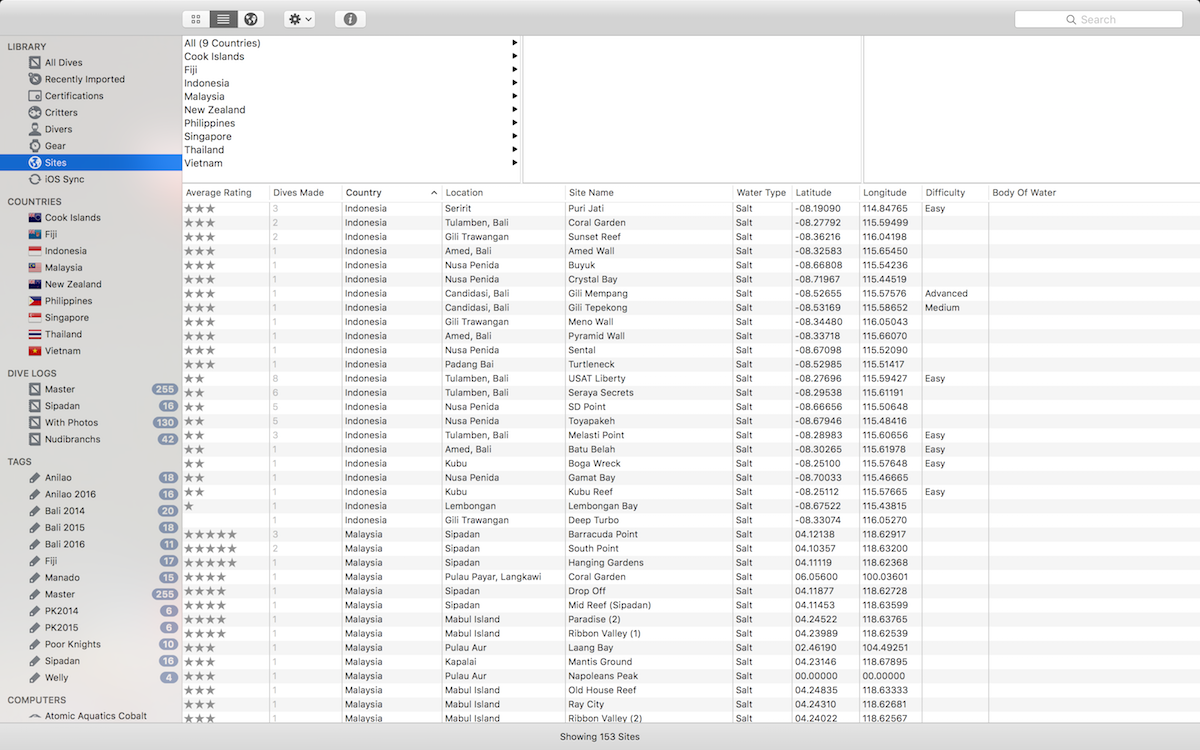
Viewing SitesThere are three view modes for Sites, that you can toggle via View Options in the Toolbar:
In List View you will see a Column Browser at the top of the screen. This lets you filter by Location and Country quickly. Site Map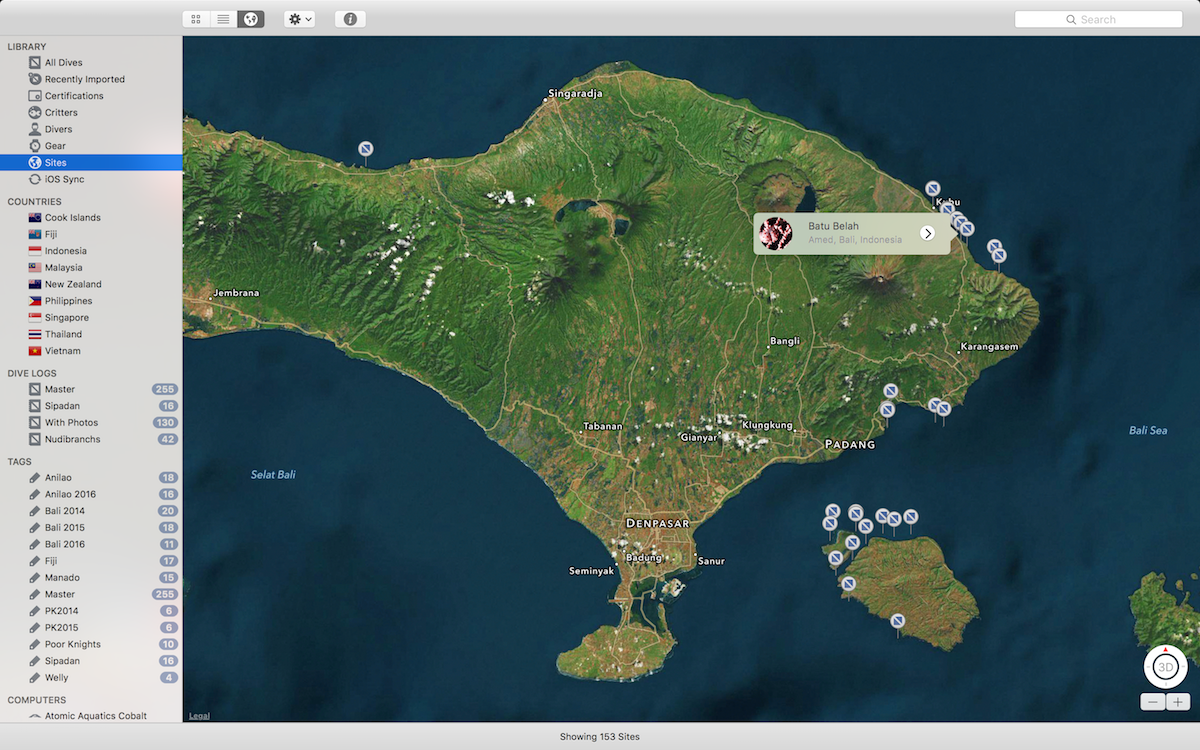
You can toggle the view mode in the toolbar to view a map of all of your sites. You can pan and zoom around the map, and clicking on any site will show you some basic details. Clicking the ">" disclosure button will take you to a list of all of the dives made at that particular site. Creating SitesTo create a new site from the Sites view, use one of the following methods:
From elsewhere in the application, you can choose New Site from the Quick Action Menu (see Toolbar). If you are using the Thumbnail view you can also click the "+" icon at the bottom of the view. Deleting SitesIf you are using the Thumbnail view, hovering over a site will show you a delete button: 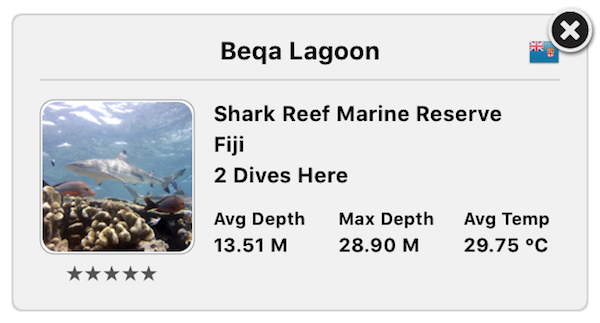
Clicking the delete button will remove it. If you are in the List view, you can delete the selected site(s) in two ways:
Editing Site DetailsYou can edit the details of a site directly in the table in the List view, by clicking on some text: 
You can also use the Site Inspector (see below) to edit all of the selected sites. This is great when you're back from a dive trip and want to edit a bunch of sites with similar information at the same time. The Site InspectorThe Site Inspector allows you to view and edit the selected sites. 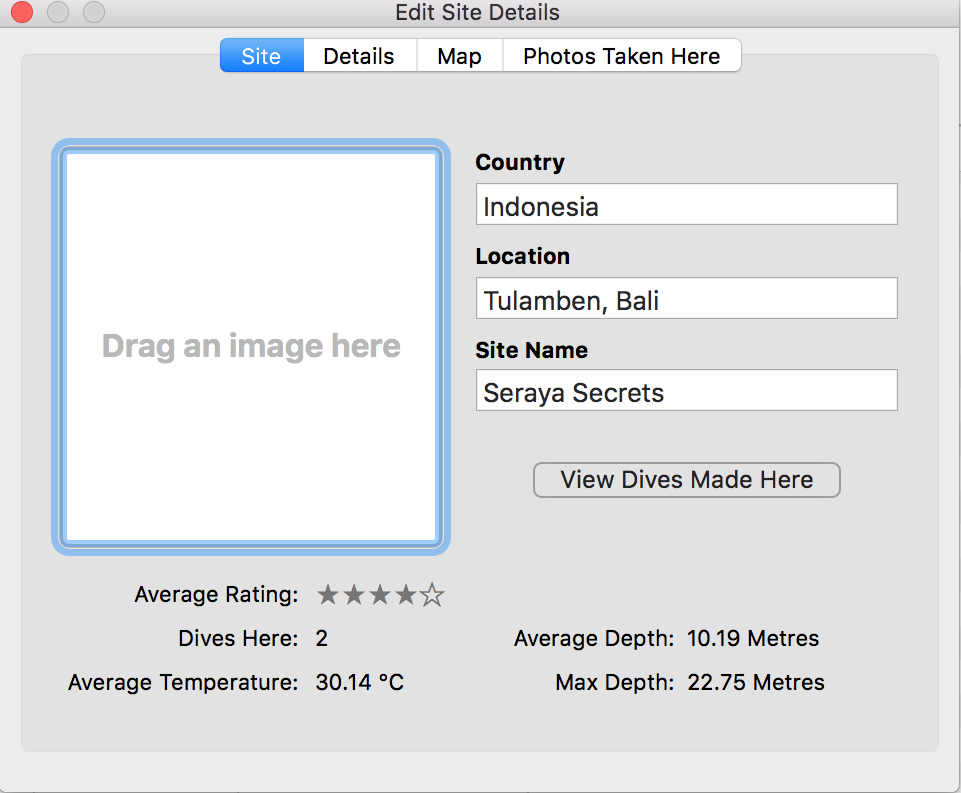
The Site Inspector can be accessed the same ways as the Dive Inspector, and also by double-clicking on a Site in Thumbnail view. |